First of all, you must be wondering what a DDNS is. It stands for Dynamic DNS, and it’s basically a way to automatically update the IP address a domain points to.
But why would anyone need that? Well, as a dev who likes to access their desktop, routers and other devices at home, and who also has bought a fancy domain, such thing can come in handy for the cases where you don’t have a static IP from your internet provider. So, instead of having to remember you current IP every time, or having to ask your brother to check it for you while you’re out (this happened to me more than once), you can just remember a well known address and be happy to know that it’ll always point to the right IP.
There are some available solutions for that already, like No-IP, DuckDNS or DynDNS, but they usually don’t allow you to use your own custom domain for free, and making something yourself is always nicer.
Before we get started, make sure that your domain provider doesn’t have their own DDNS solution, like namecheap does, or if they have an easily available API, like Cloudflare does.
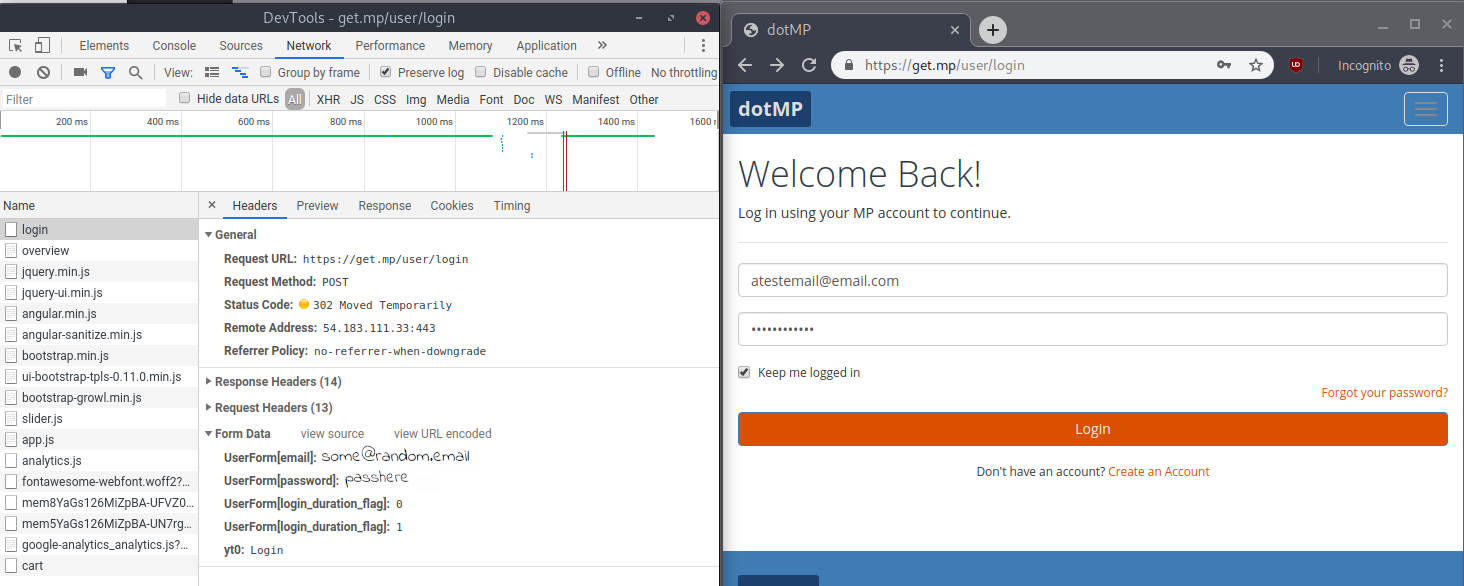
In my case, since I opted for an exotic .mp TLD, the aforementioned solutions don’t work for me, so I had to find my own way through the registrar website to update the IP a subdomain of mine points to. Luckily, the site is kinda lame and Chrome’s DevTools helped me a lot, allowing me to check how they managed their login sessions, and how the update process for a record worked.
 |
 |
|---|---|
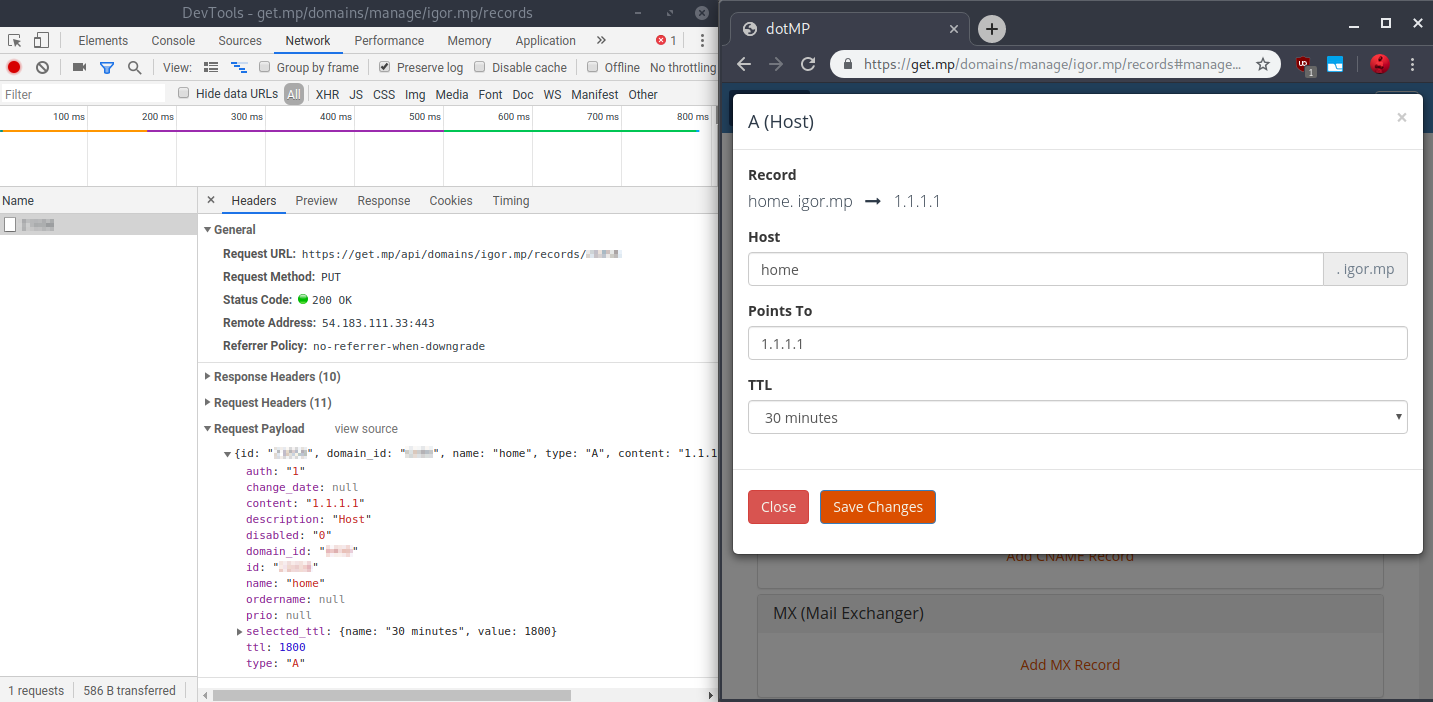
| A simple POST request to get our login cookie | An even simpler PUT request to update our records |
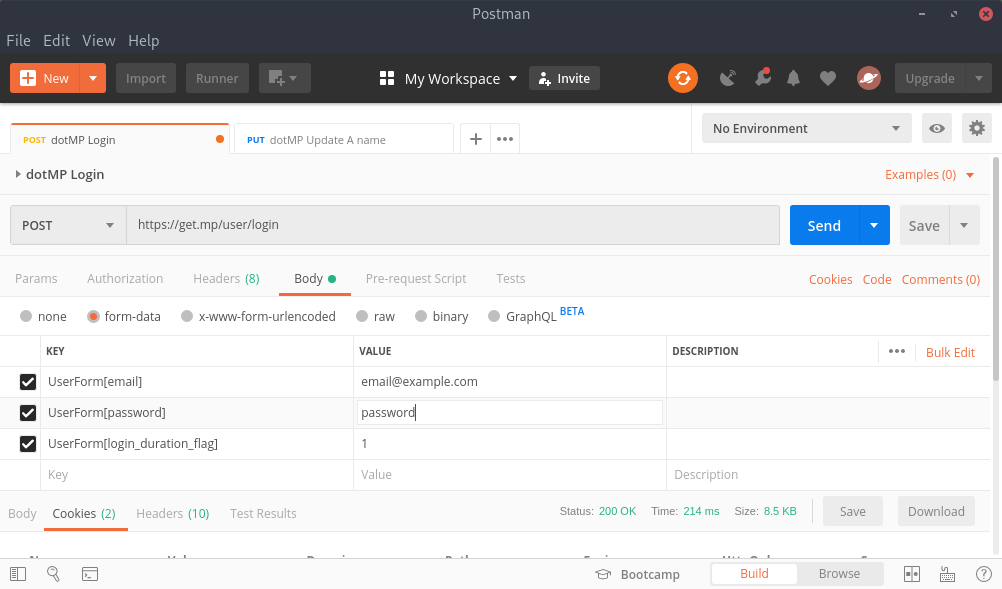
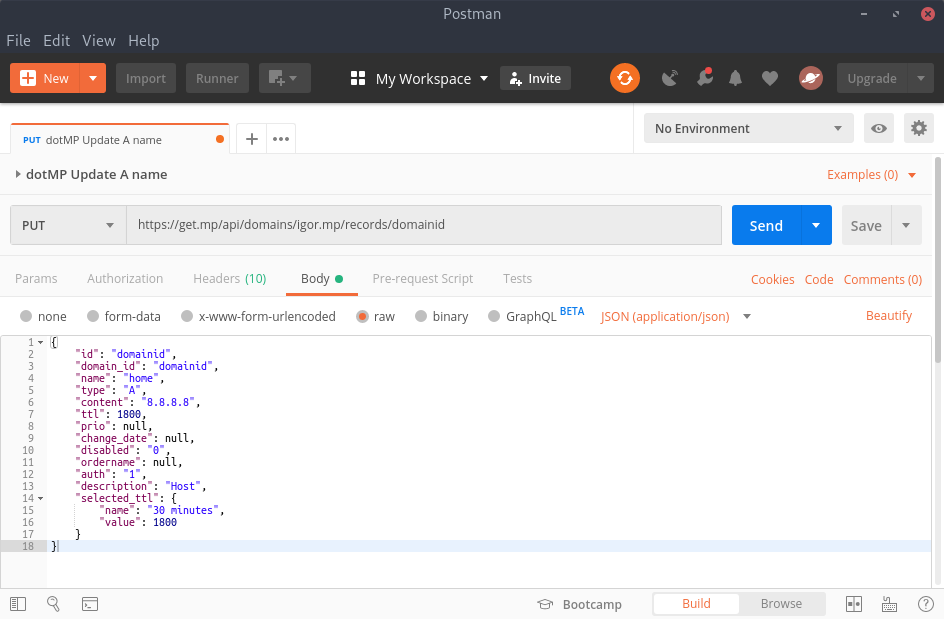
Simulating those requests through Postman to make sure they’d work was a breeze.
 |
 |
|---|---|
| Simulated login request | Simulated update request |
Now let’s get into some code. I’ve chosen to go with Go because it’s simple and I like it. Making a login session through our client is pretty easy, just setup a cookie jar and a http client containing it, fill your POST values and send that data.
// Our client with its cookies
jar, _ := cookiejar.New(nil)
client := &http.Client{
    Jar: jar,
}

// Login form data
postData := url.Values{}
postData.Add("UserForm[email]", YOURUSERNAMEHERE)
postData.Add("UserForm[password]:", YOURPASSWORDHERE)

// Perform a login in order to get our credentials cookie
login, err := client.PostForm(ADDRESSTOPOST, postData)
if err != nil {
    return err
}
That should leave us with our login cookie inside our cookie jar. Next step is to actually mimic the request to update our IP address.
// That's awful and there should be a better way to do that
mockJSON := `{"id":"123","domain_id":"456","name":"home","type":"A","content":"1.1.1.1","ttl":1800,"prio":null,"change_date":null,"disabled":"0","ordername":null,"auth":"1","description":"Host","selected_ttl":{"name":"30 minutes","value":1800}}`
var jsonMap map[string]interface{}
json.Unmarshal([]byte(mockJSON), &jsonMap)

// Our relevant data to update the IP
jsonMap["content"] = NEWIPADDRESSHERE

formattedJSON, err := json.Marshal(jsonMap)
if err != nil {
    return err
}

// Actual request to update the IP
req, _ := http.NewRequest("PUT", ADDRESSTOUPDATEIP, strings.NewReader(string(formattedJSON)))
req.Header.Add("Content-Type", "application/json")

resp, err := client.Do(req)
if err != nil {
    return err
}
A good idea would be to encompass both things above into a single function that can be called with the new IP that we want to update to, such as func updateIP(newIp string) error{}, which returns an error if anything goes wrong.
Another thing that we need is a way to find out if our IP changed, and, if so, call our newly made function. For that, I’ve used ipify, mostly because they offer code snippets for almost every language. Enclosing their snippet into a function and checking for changes should be also easy enough.
ip := ""
for {
    // Call for our ipify function
    newIP, err := getCurIP()
    if err != nil {
        log.Fatal("[ERROR]", err)
    }
    if ip != newIP {
        if err := updateIP(newIP); err != nil {
            log.Fatal("[ERROR]", err)
        } else {
            log.Println("[INFO] IP updated to", newIP)
            ip = newIP
        }
    }
    // Sleeps for 5 minutes before checking for changes again
    time.Sleep(5 * time.Minute)
}
And that’s it! You can make this code be kept running through cron, systemd or whichever system manager you like. The actual code I’ve used, with some extras such as loading data from env vars and a systemd unit file, can be found in my github.
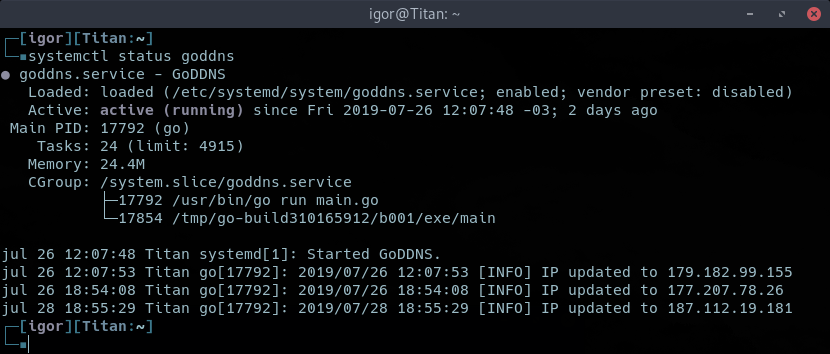
So far, it has been working perfectly fine for me, as seen by the pic bellow, and I hope this may be of any use for anyone out there.
 |
|---|
| Service running in my machine through systemd |